
Quick Links:
- Waivers Overview
- How to Set Up a Waiver
- What Your Customers See
- Buying for Someone Else
- Sending a Ticket
- Changing Details Later
- What You Can See Afterwards
- Top Tips
Waivers Overview
A waiver is a type of attendee field. You write the waiver text and choose what each attendee fills in, such as a signature, a photo, a checkbox or a short answer. Your customers sign after they buy, when they add the ticket holder's details for each ticket.
Waivers suit events where every participant needs to agree to your terms, such as motorsport, fitness challenges, adventure activities and skate nights. You can add more than one waiver to an event, and limit each one to the ticket types that need it, such as participants but not spectators.
A waiver never holds up checkout. At the door, the scanner shows whether each ticket holder has signed, but it doesn't stop anyone getting in.
Waivers work on events and add-ons. They aren't available for memberships.
How to Set Up a Waiver
- Go to Events, open your event and select the Customer details tab.
- Turn on Attendee details.
- Select Add attendee field, then Waiver.
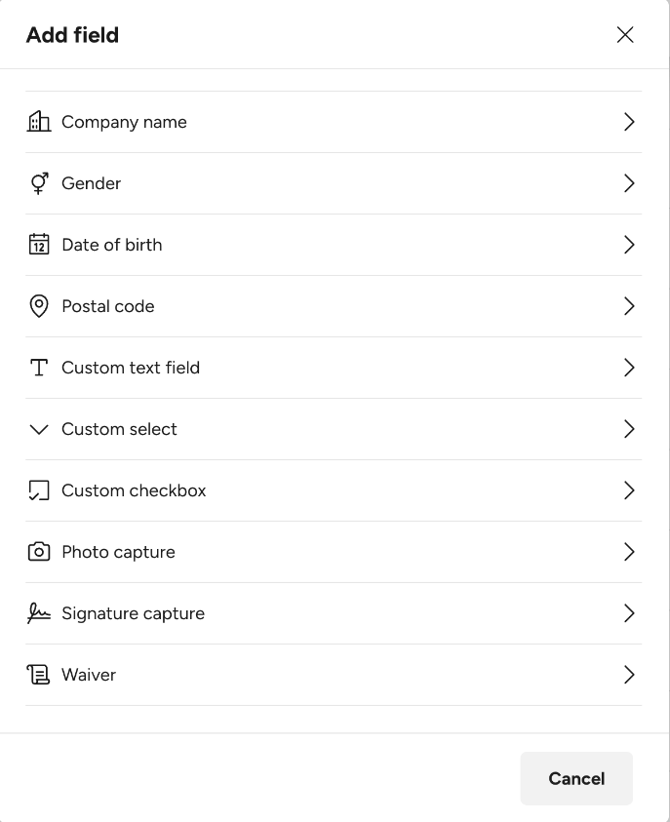
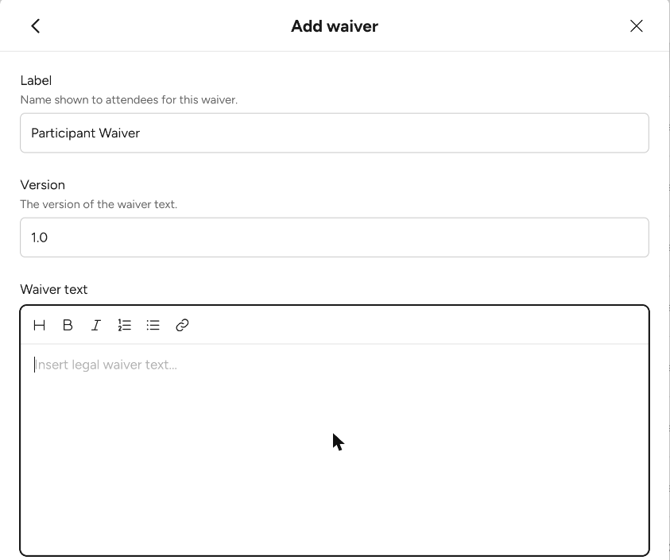
- Enter a Label. This is the waiver name your customers see.
- Enter a Version, such as 1.0.
- Type or paste your terms into Waiver text. You can add headings, bold text, lists and links.
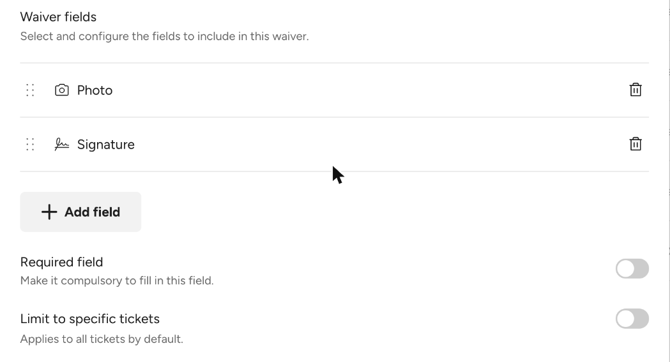
- Under Waiver fields, choose what your customers fill in. A new waiver starts with a Photo and a Signature. Select Add field to add a Custom checkbox, Custom select, Custom text field, Signature capture or Photo capture.
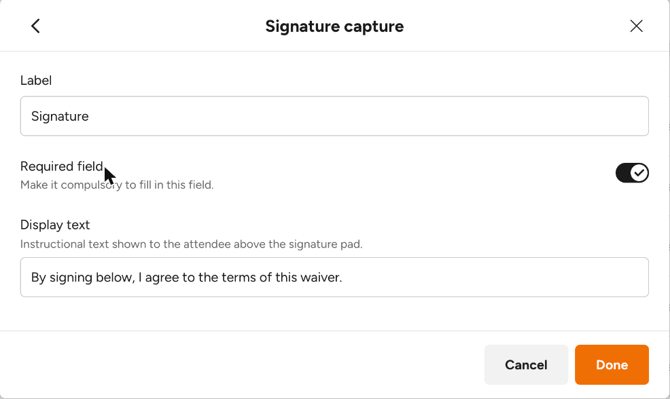
- Select a field to edit it, turn on Required field for anything your customers must complete, then select Done.
- To use the waiver on some ticket types only, turn on Limit to specific tickets and select them.
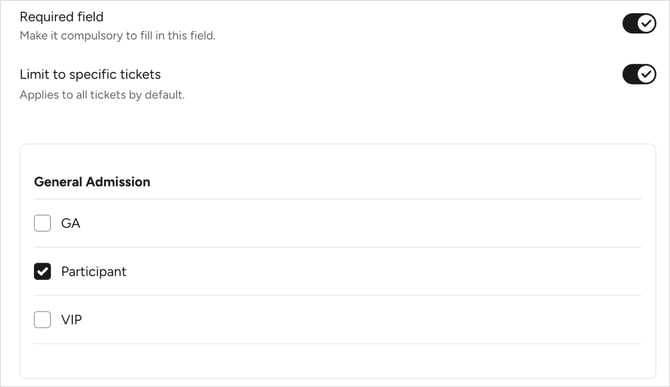
- At the bottom of the panel, select Add field to save the waiver.
The waiver applies right away, including to tickets you've already sold.
Note: The Required field switch on each field inside the waiver decides what your customers must complete, and new fields start as optional. The Required field switch on the waiver itself only marks the waiver as required in the form. On its own, it doesn't make anyone sign.
Caution: Add-ons only get a waiver when you select them under Limit to specific tickets.
What Your Customers See
- Your customer buys their tickets as normal. Checkout doesn't change.
- After checkout, they're asked to add the ticket holder details. Their confirmation email also links to their tickets, and they don't need to log in. Each ticket shows Extra details required until it's named.
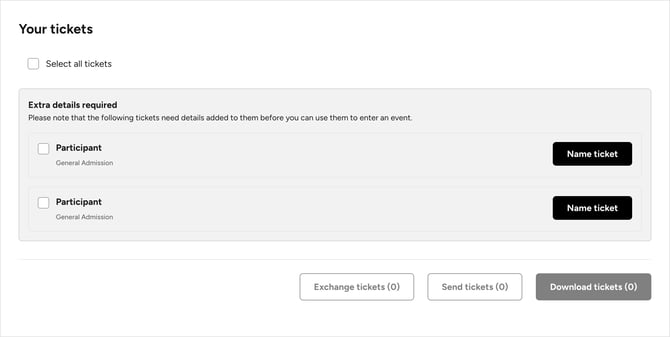
- They select Name ticket, choose This is for me and check their details.
- They select Complete Waiver, read the waiver and fill in each field. They can take or upload a photo and sign on screen.
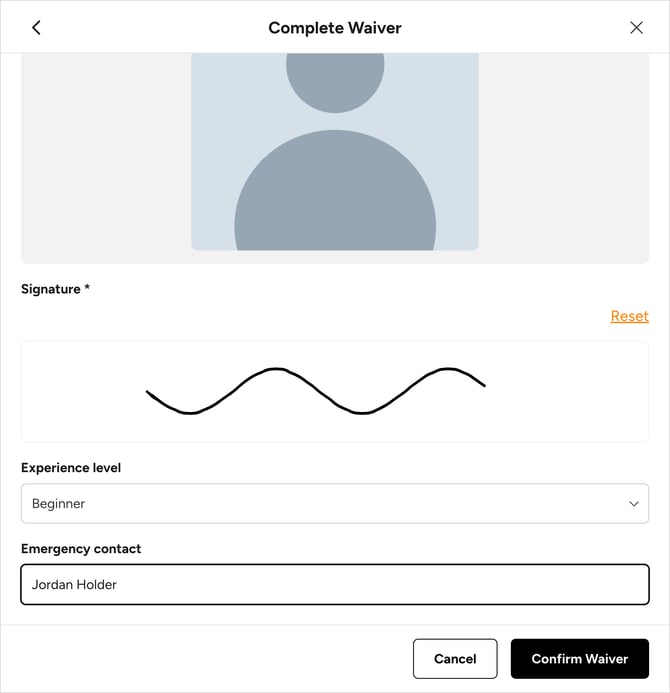
- They select Confirm Waiver. The form now shows Signed by with their name.
- They select Save and continue, and their ticket QR code appears.
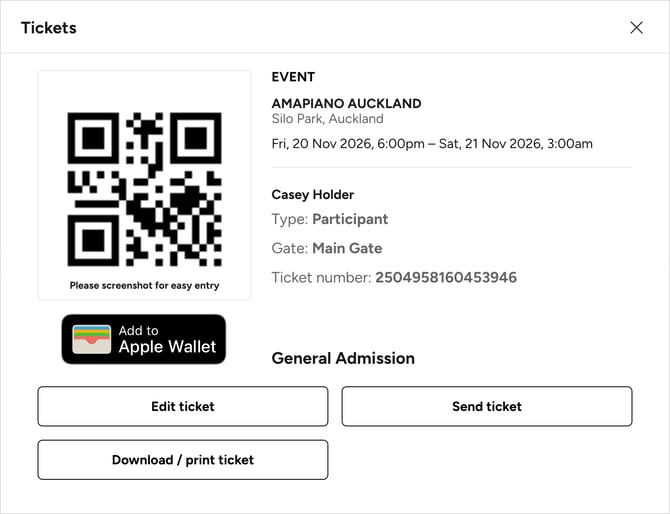
If a required field is missing, they see "Please complete the waiver to continue." and can't save until it's done.
Afterwards, Edit ticket shows "Signed by" with their name, the date and time, and a View agreement link. Photos and signatures are private, so customers who aren't logged in see "Photo is protected" instead. 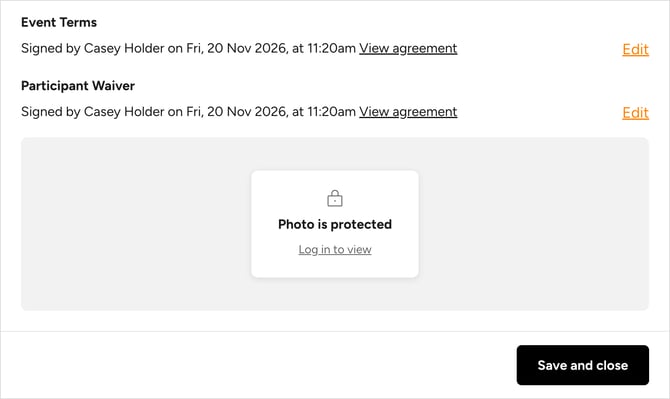
Buying for Someone Else
If your customer selects This is for someone else, the waiver becomes optional. They can save the ticket holder's name and email without anyone signing, and the ticket's QR code still works. The ticket holder gets an email with a link to their ticket, but it doesn't mention the waiver. 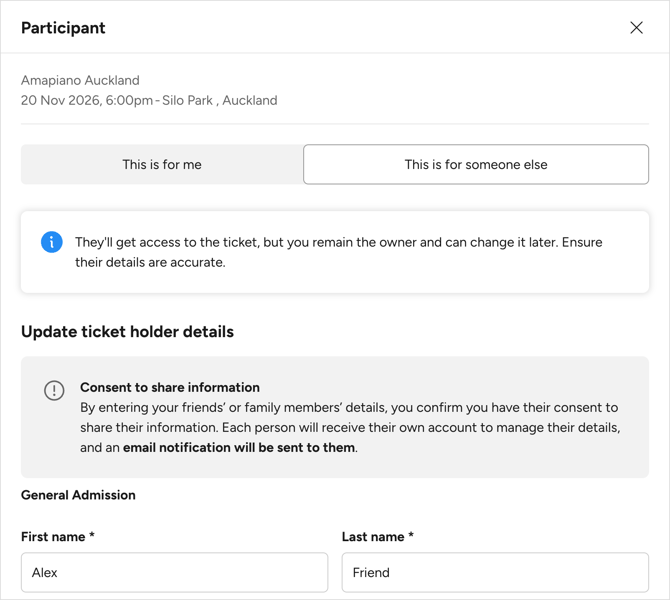
The ticket holder can still sign later from the link in their email, unless you've turned on Prevent renaming tickets. They select View ticket, then Edit ticket, and complete the waiver. Nothing reminds them to, so if every attendee must sign, ask your customers to send each ticket to its holder instead.
Sending a Ticket
When a customer sends a ticket, Flicket clears the waiver and deletes the photo and signature. The sender's ticket goes back to Extra details required. 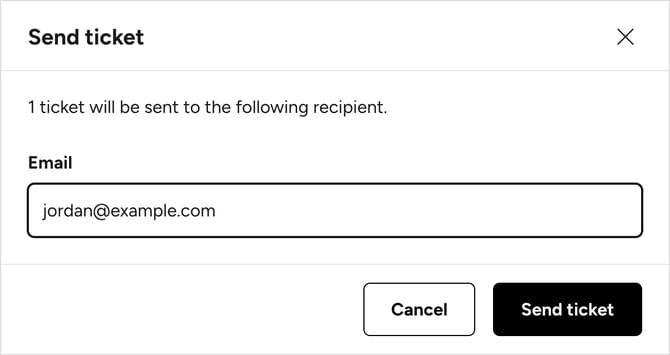
The recipient gets an email with a View tickets link and doesn't need to log in. Their ticket has no QR code until they select Name ticket, enter their details, complete the waiver and save.
Caution: The recipient's form opens with the previous ticket holder's name and phone number filled in. Ask recipients to replace them with their own details before they sign. 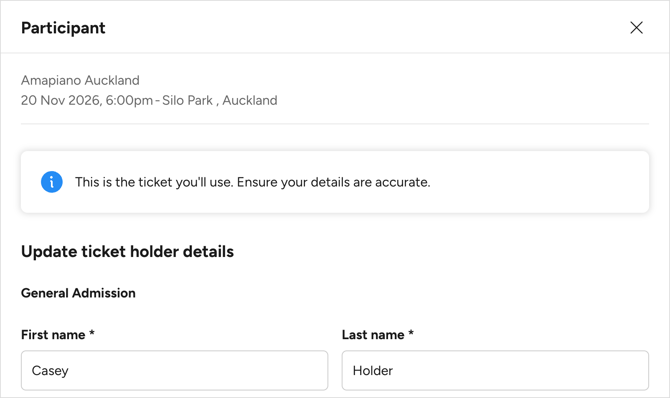
If you use Ticket Transfer or Resale, the buyer gets a new ticket and signs their own waiver.
Changing Details Later
Your customers can update their details under Edit ticket, unless you've turned on Prevent renaming tickets.
- If they change the ticket holder's first or last name, the waiver is cleared when they save, and the photo and signature are deleted. Nothing warns them and their QR code keeps working, so ask them to sign again right away.
- Selecting Edit on a signed waiver opens a blank copy, so they sign the whole waiver again.
- With Prevent renaming tickets on, details can't be changed once saved. A ticket saved for someone else without a signature can't be signed later.
What You Can See Afterwards
- Ticket detail report: go to Reporting, choose your event and select Reports. Under Ticket detail report, select Download, check each waiver under Attendees, then select Download. Signed tickets show the waiver details, including who signed and when. Unsigned tickets are blank. Flicket remembers which columns you checked.
- A single ticket: go to Customers, open the customer who bought the ticket, select Tickets, then select the ticket. It opens the ticket as your customer sees it, including who signed and when.
- History: each signature, and each waiver cleared after a change of holder, is listed under Notes on the buyer's customer page, including who signed before.
- At the door: for tickets with a waiver, the scanner shows Waiver signed by with the name and date, or No waiver signed. It doesn't stop entry, and it works offline.
Top Tips
- A photo adds a step for every attendee. Remove it if you don't need ID.
- Change the Version whenever you change the waiver text. Customers who already signed aren't asked to sign again.
- Put your "I agree" wording in the waiver text or a checkbox. The signature's Display text isn't shown to customers, even though its description in admin says it is.
- Check the ticket detail report before your event and follow up anyone who hasn't signed. Flicket doesn't send reminders.
- Tell your door team what to do when the scanner shows No waiver signed.
- Keep the standard First name and Last name fields. The scanner shows the signer's name from them.